Customize your brand colors
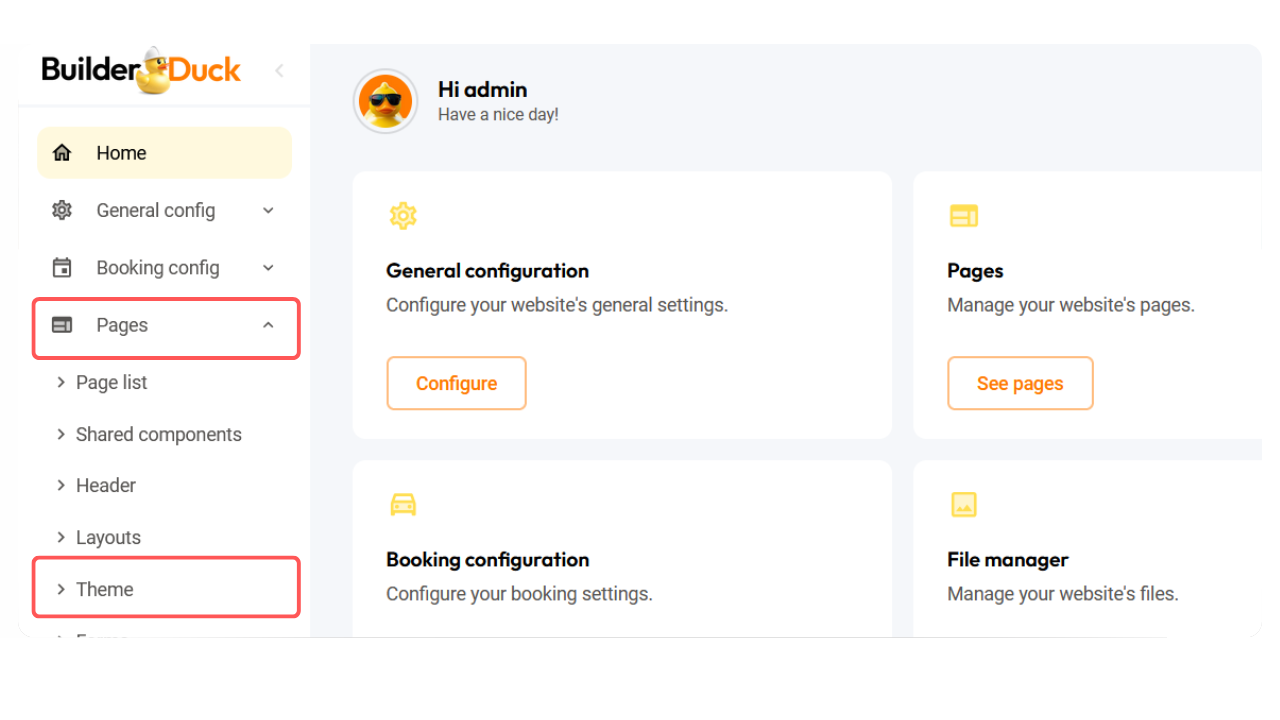
First at all, you must select which will be the background color. To do it, go to 'Pages' in the sidebar and select 'Themes.'

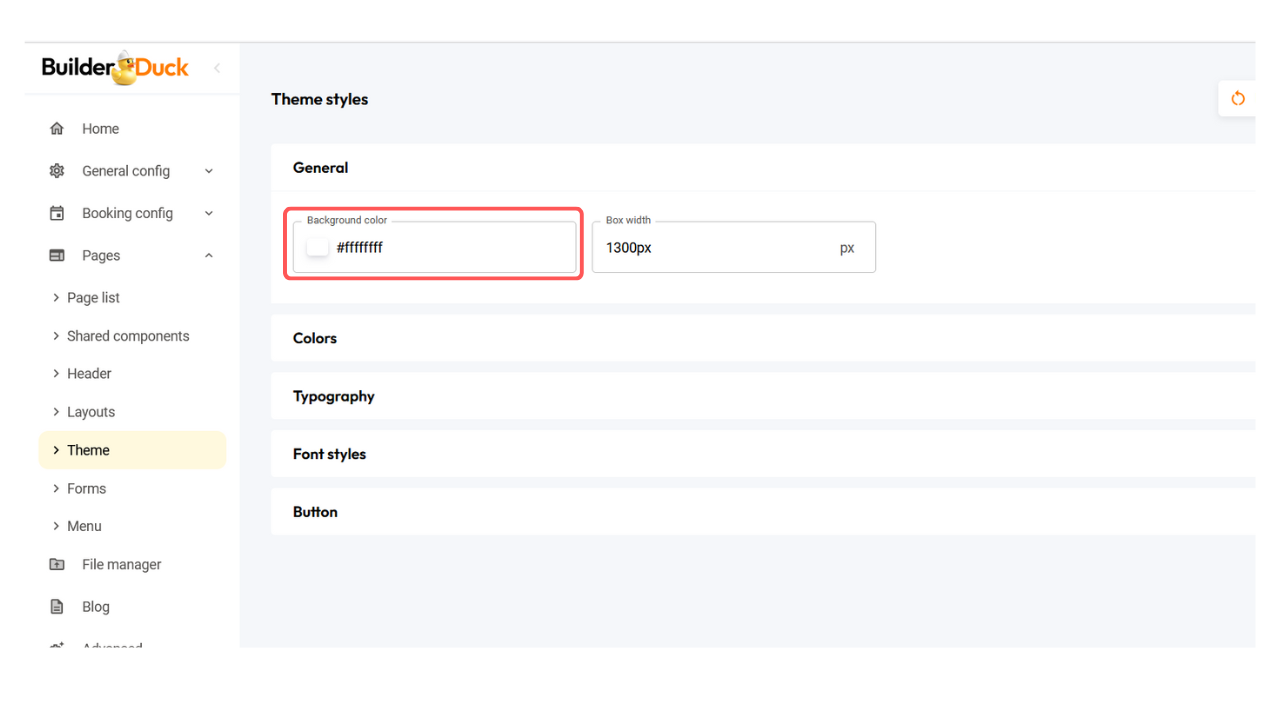
In the 'General' section you will find the 'Background Color' field. There, you can put the hex code or you can click the color box and then select a color from the color picker that appears.

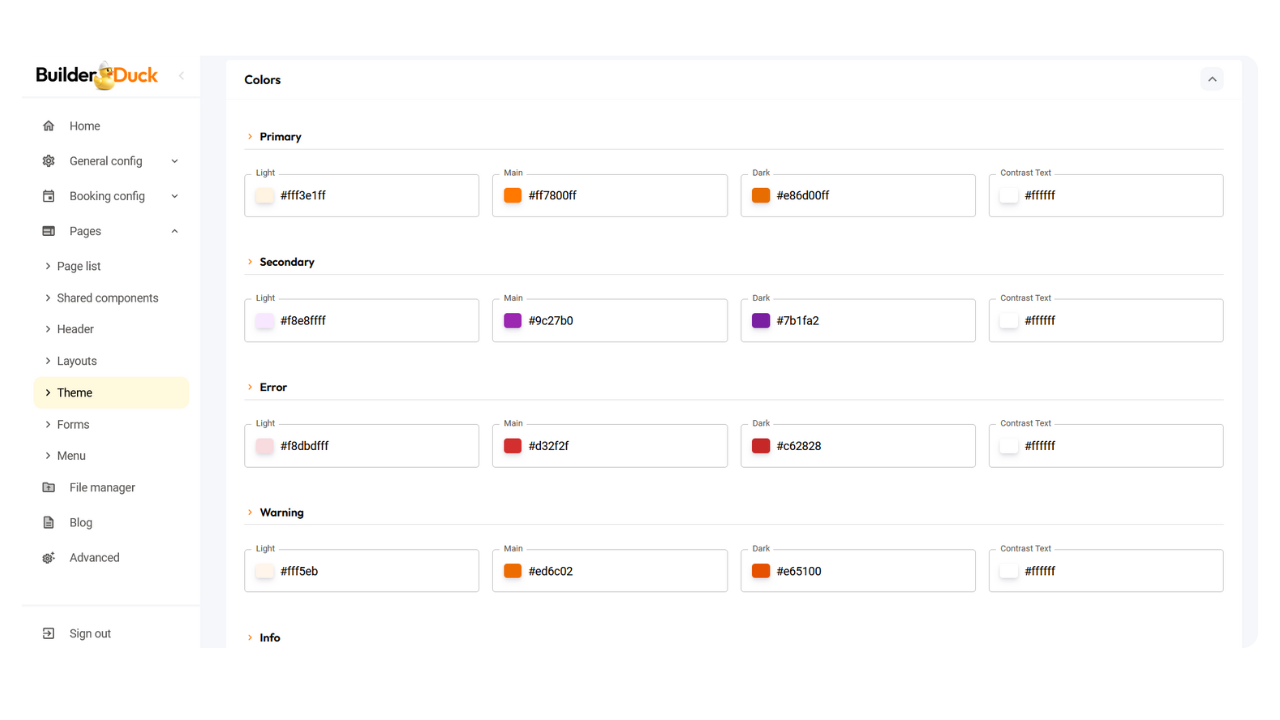
Below, you will find the section to customize your brand's colors. Click on the dropdown menu to find the fields to change your colors.
You can set up your primary, secondary, error, warning, info and success colors.

Make sure to set up the primary color along with its light and dark variations. This ensures a clear and smooth user experience on your webpage.
💡 If you don't have a secondary color, copy and paste your primary color selection.
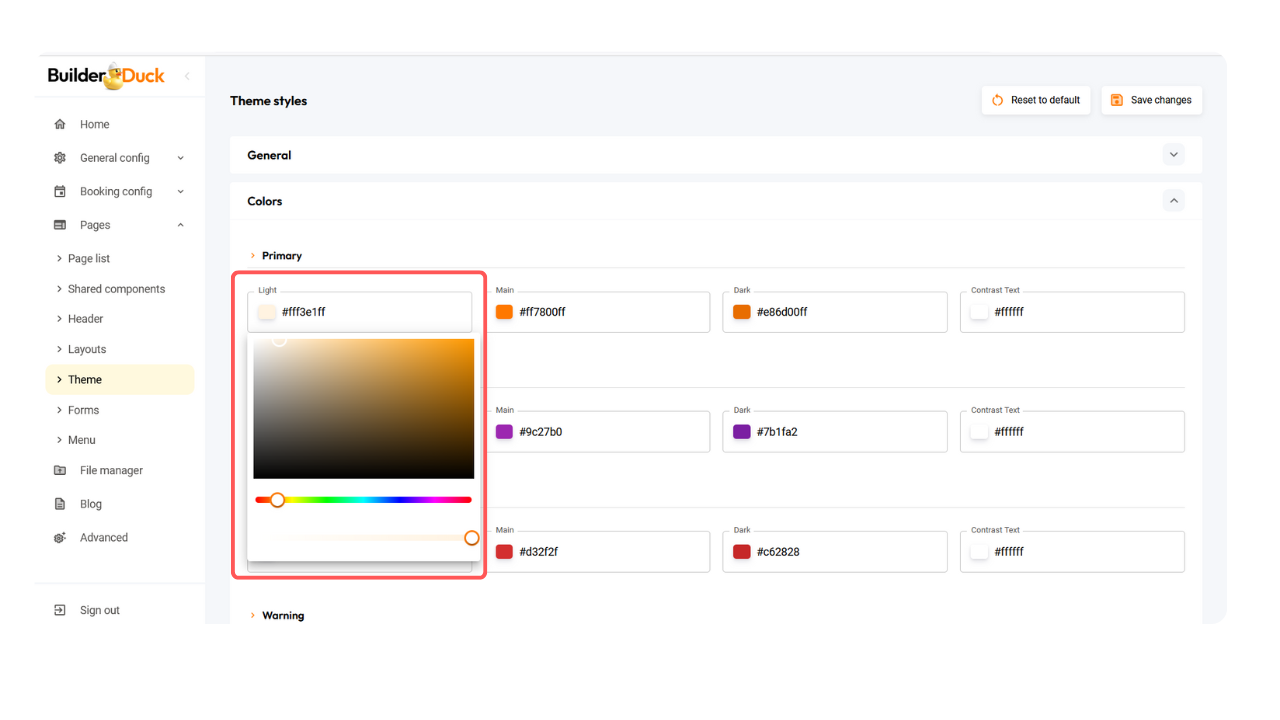
Put the hex code or you can click the color box and then select a color from the color picker that appears.

Repeat the process until you’ve customized all the colors you want to update on your webpage.
Finally, scroll up and press 'Save Changes'
You will see the changes reflected on your webpage:
.png)
❗Open your webpage to view the changes.
If a tab is already open, close it and open it again. Refreshing the page won’t update the change.
