- Rently Help Desk
- RentlySoft
- BRANCH OFFICES
How to create a route | Rently Centro de Ayuda
-
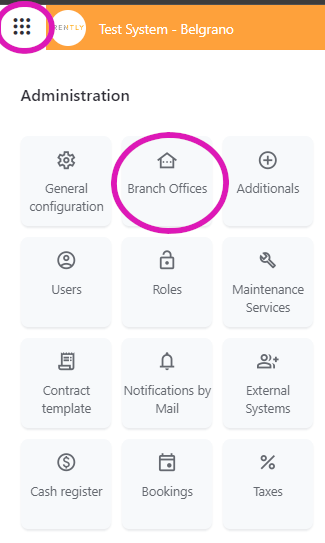
Enter Branch Offices
![](https://help.rentlysoft.com/hubfs/Knowledge%20Base%20Import/downloads.intercomcdn.comio110023941804ba83497f67a17542dca0d3image.png)
2. Click on the Branch Office you wish to modify
![](https://help.rentlysoft.com/hubfs/Knowledge%20Base%20Import/downloads.intercomcdn.comio1100242945bf060ecc2607bdb1ef16fdb2image.png)
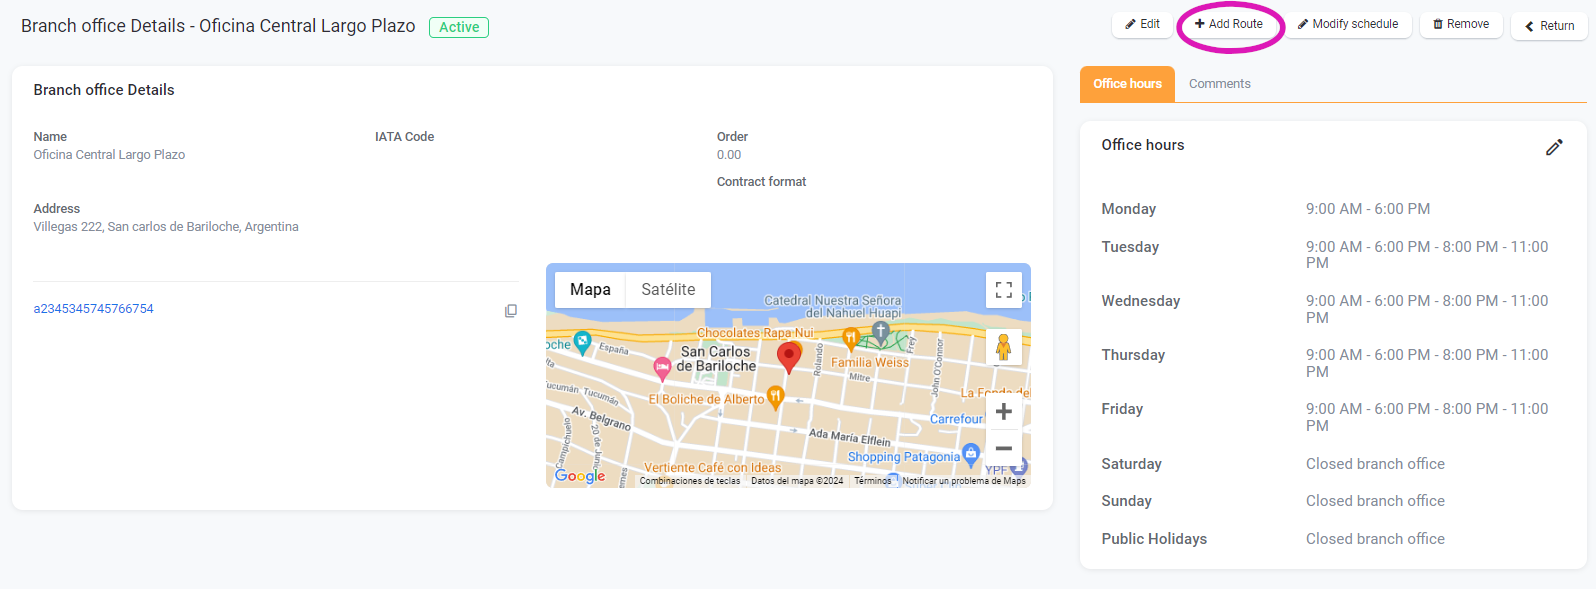
3. In the upper right corner of the Branch Offices section, you'll find the "Add Route" button
![](https://help.rentlysoft.com/hubfs/Knowledge%20Base%20Import/downloads.intercomcdn.comio1100248315962b405e93b5bc74e6f34c16image.png)
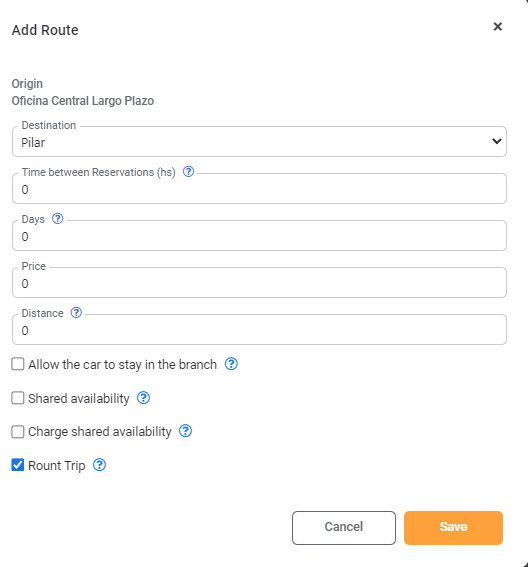
4. Choose the destination you want to enable and complete the form fields as necessary
![](https://help.rentlysoft.com/hubfs/Knowledge%20Base%20Import/downloads.intercomcdn.comio1100259297586f0c5163696ffb40414e87image.png)
5. Click on SAVE